


onQloud Products
onQloud Remote Monitoring and Management solution supports the Windows 7, 8.1, 10 and Windows Server 2012R2 – 2019 operating systems.
Here’s a short overview of the features our solution provides:
Now we overview the installation process and walk you through the user interface of the onQloud Remote Monitoring and Management solution.
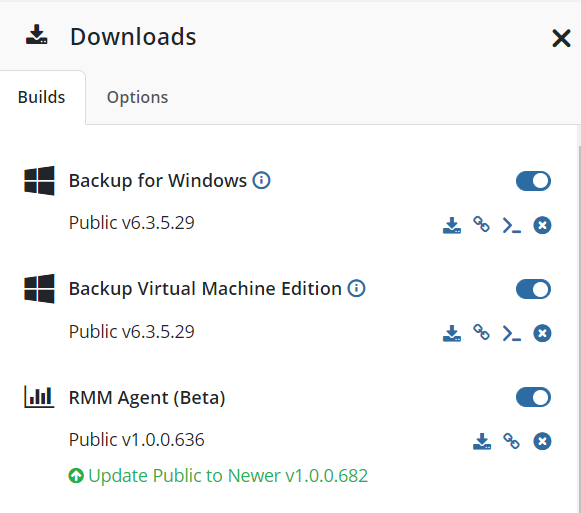
To start using the solution, you need to install the agent on the target computer. To do this, go to the Downloads tab.
Here, you can either download the RMM agent or copy the link to send it to the required user. The agent should then be installed on the target computer. Following this, you will be able to see the computer on the RMM tab, Remote Management section.
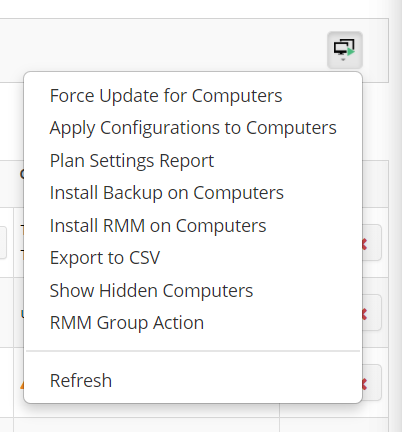
Alternatively, you can install the onQloud Remote Management solution on all computers. To do this, go to the RMM tab, Remote Management section; in the upper-right corner, find the Group actions button, click it and select the Install RMM on Computers option.
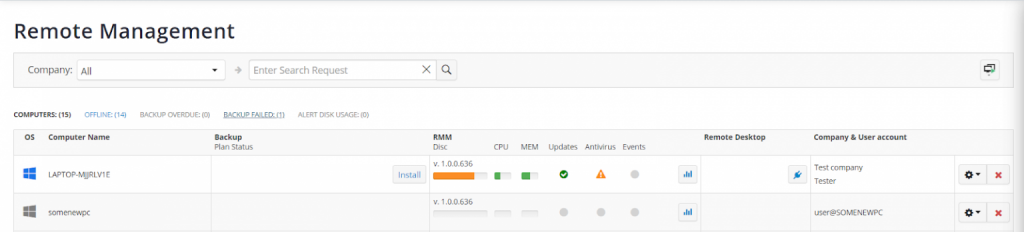
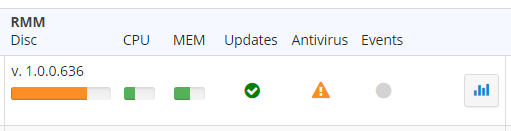
After you have installed the onQloud Remote Management solution on the target computer, you will see it on the RMM tab, Remote Management section.
This tab shows you general information, such as the computer name, disk, CPU and memory usage, and warns you if you have any available updates for your operating system or antivirus, or event log issues.
To manage a specific computer, click on the button in the right corner of the RMM section, or any of the status bars.
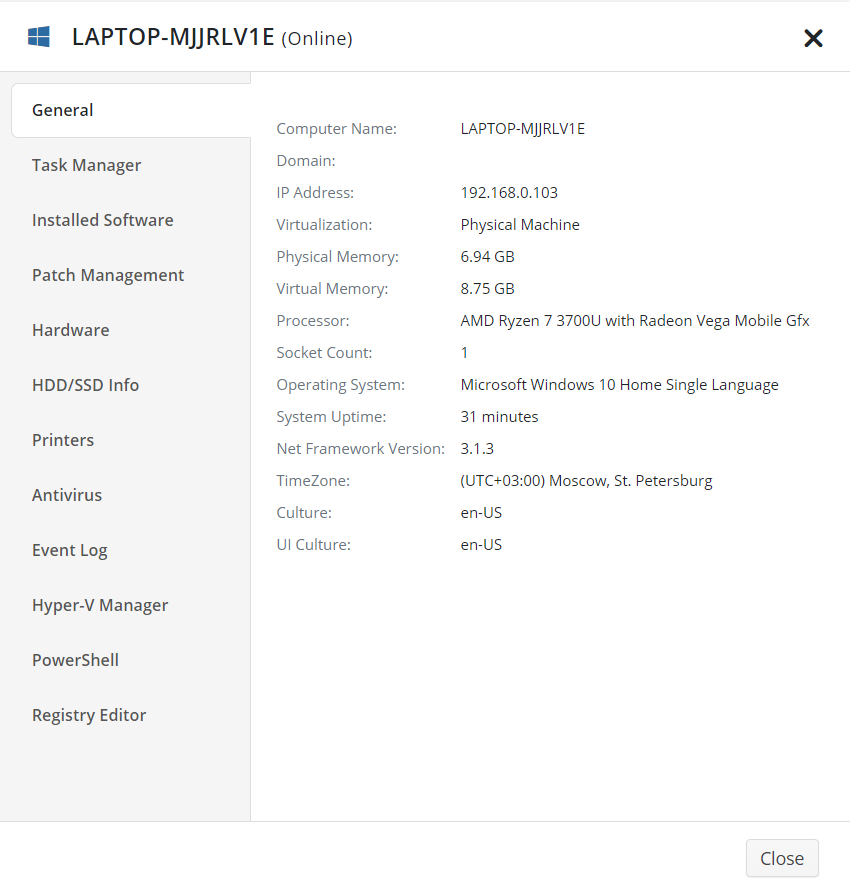
You will then see a slide-in tab. The right-hand part of the tab shows information and allows you to manage the solution. On the left, you can select the required section of the tab.
Additionally, you can click the arrow button in the upper-right corner of some of the tabs in order to open a modal window with more detailed information about that specific tab.
The General tab provides you with basic information about the target computer, including the computer name, whether it has been added to the domain, its IP address and other information.
The next tab, Task Manager, allows you to monitor the computer’s performance, processes and services in real time.
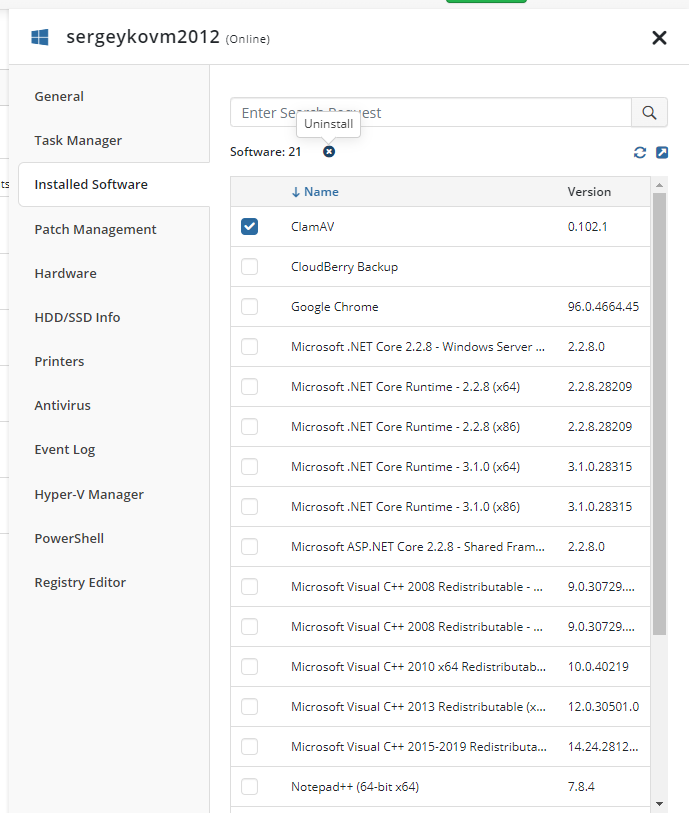
The Installed Software tab is pretty self-explanatory. To uninstall a specific application remotely, select the required software from the list and click the “x” button.
The next tab, Patch Management, allows you to install OS updates on your users’ machines and check the updates that have already been installed.
The next tab shows you the installed hardware and its status.
On the HDD/SSD Info tab, you can see the hard drive details for the given user. If you click the button near the text “SMART”, you will see more detailed and technical information about that storage device.
On the next tab, Printers, you can see the status and detailed information about all the printers connected to that computer.
In the Antivirus tab, you can check the status of the antivirus installed on the machine and also update its databases. To do this, click on the checkbox near the required antivirus, followed by the Update Database button.
On the Hyper-V Manager tab, you can start, turn off or restart your Hyper-V virtual machines. If you open the modal window, you will also see detailed information about them.
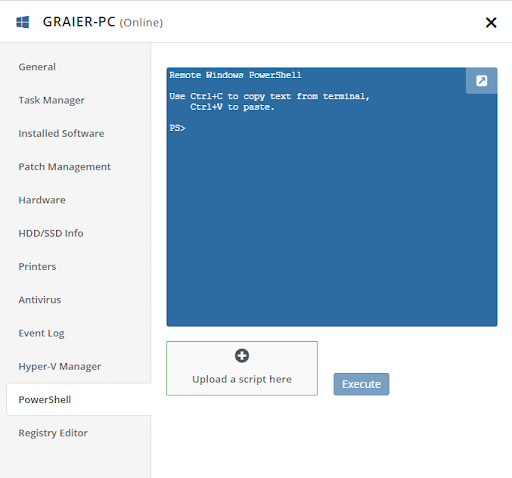
On the next tab, PowerShell, you can run or upload any PowerShell scripts. Bear in mind that this option is only available if you have enabled two-factor authentication. To do this, go to the Settings tab, General section and enable 2FA. Once this is done, you will be able to write, upload and execute PowerShell scripts on the given machine.
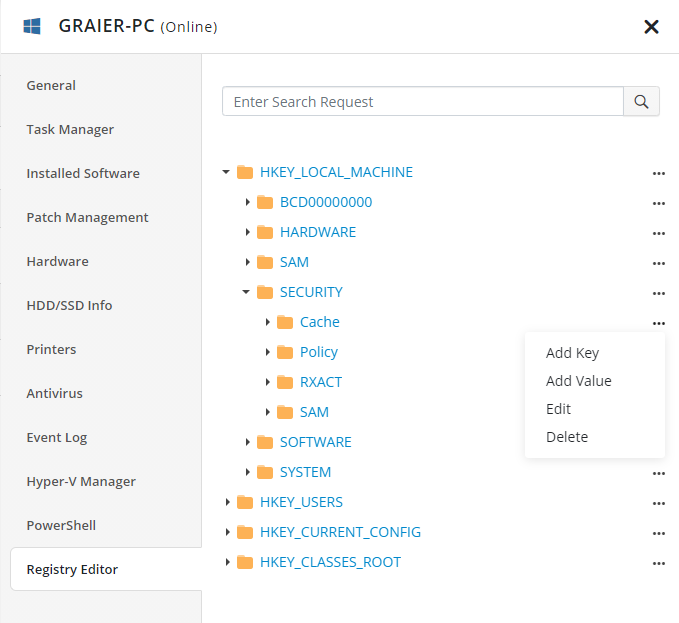
The last tab, Registry Editor, allows you to view and manage registry entries within a user’s machine.
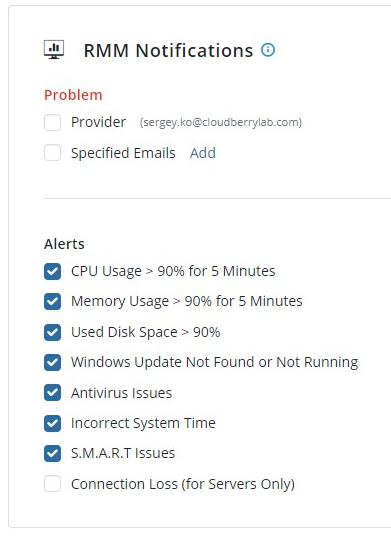
You can also set up alerts for all companies or for specific company in Settings tab, Notifications section. onQloud RMM service features the following alert types: CPU and memory usage, used disk space, Windows updates, antivirus issues, incorrect system time, lost connection with server and S.M.A.R.T issues.
That’s it. If you have any questions regarding the onQloud Remote Monitoring and Management service, feel free to contact our pre-sales team. presales@anamtech.com
Don’t miss our future updates! Get Subscribed Today!
© 2023. onQloud Technologies LLC. All Rights Reserved.
| Cookie | Duration | Description |
|---|---|---|
| cookielawinfo-checkbox-analytics | 11 months | This cookie is set by GDPR Cookie Consent plugin. The cookie is used to store the user consent for the cookies in the category "Analytics". |
| cookielawinfo-checkbox-functional | 11 months | The cookie is set by GDPR cookie consent to record the user consent for the cookies in the category "Functional". |
| cookielawinfo-checkbox-necessary | 11 months | This cookie is set by GDPR Cookie Consent plugin. The cookies is used to store the user consent for the cookies in the category "Necessary". |
| cookielawinfo-checkbox-others | 11 months | This cookie is set by GDPR Cookie Consent plugin. The cookie is used to store the user consent for the cookies in the category "Other. |
| cookielawinfo-checkbox-performance | 11 months | This cookie is set by GDPR Cookie Consent plugin. The cookie is used to store the user consent for the cookies in the category "Performance". |
| viewed_cookie_policy | 11 months | The cookie is set by the GDPR Cookie Consent plugin and is used to store whether or not user has consented to the use of cookies. It does not store any personal data. |
